the official cocktail of new orleans: sazerac

thirsty thursday
notes from maggie's farm


Today, we're waking up in The Big Easy one the second day of our whirwind surprise road trip to celebrate our anniversary.  We plan to make our way to the Roosevelt for the official cocktail of New Orleans, the Sazerac, which we visited with a post earlier this year.  Cheers to you all, and looking forward to sharing our adventures upon our return home.  Meanwhile, tip back a Sazerac with us?


One of the oldest known cocktails with it's origins in pre-civil war New Orleans, the Sazerac is the official cocktail of New Orleans.


Back in the early 1800's, Antoine Peychaud created the drink in a French Quarter bar and named it for his favorite French brandy, Sazerac-de-Forge et fils. In 1870, the drink was changed when American Rye whiskey was substituted for cognac, and a dash of absinthe was added by bartender Leon Lamothe, and today he is now regarded as the Father of the Sazerac. In 1912, absinthe was banned, so Peychaud substituted his special bitters in its place.


In 1893 the Grunewald Hotel was built in the city, and at this time the hotel earned the rights to Ramos Gin Fizz and the Sazerac. In 1965 the hotel was renamed the Fairmont Hotel.


Sipping a Ramos Gin Fizz and lolling inside the magnificently restored Sazerac Bar in the Roosevelt New Orleans is one of the quintessential New Orleans experiences. But prior to 1949, it was a New Orleans experience reserved exclusively for men: women were only allowed to cross the threshold of the Sazerac on Mardi Gras day. Those rules changed on September 26, 1949, when a group of well-to-do New Orleans ladies marched into the Sazerac Bar for a drink, an event immortalized in the picture above.


Today, the Sazerac is best enjoyed in many of New Orleans' finest restaurants and bars, most notably the Sazerac Bar in the former Fairmont Hotel, reopened after Hurrican Katrina as The Roosevelt, Waldorf Astoria, where celebrities, locals, and tourists enjoy the drink.


"Set inside the Roosevelt, an historic landmark hotel, the Sazerac Bar gracefully embodies the grand history of drinking and socializing in New Orleans, only you'll find a younger generation of tipplers and savvy visitors appreciating the bar's list of classic cocktails. Restored WPA murals by Paul Ninas flank the curvaceous wood and tile room, and skilled bartenders pour the bar's namesake cocktail and Ramos Gin Fizzes with aplomb. (This is, afterall, the bar where the notorious governor of Louisiana, Earl K. Long, parked it for a sip of his favorite drink.) History and tradition are ingrained in the DNA of New Orleans, and spending an afternoon sipping a few at the Sazerac Bar at the Roosevelt is one tradition you don't want to miss". --Colleen Rush, food writer


Sazerac
Epicurious | February 2007

  • 1 cube or 1/2 teaspoon sugar
  • 4 dashes Peychaud Bitters
  • Splash water, about 1/2 teaspoon
  • 2 ounces rye whiskey
  • Splash Herbsaint (or Pernod), about 1/2 teaspoon
  • Lemon peel for garnish
  • Ice
preparation
In old-fashioned glass, add ice and set aside. In another, combine sugar, bitters, and water. Muddle until sugar is completely dissolved. Add rye whiskey, fill with ice, and stir well, about 15 seconds. From first glass, discard ice, then add Herbsaint. Holding glass horizontally, turn it so that Herbsaint completely coats the interior. Discard any excess. Strain contents of second glass into chilled glass. Twist lemon peel directly over drink to release essential oils, and serve.


Read more about the storied history of the Roosevelt, and it's famous cocktail:
The Glory Days of the Roosevelt Hotel, Times-Picayune
The Roosevelt New Orleans Hotel, Wikipedia
The Sazerac Bar, 12 Bottle Bar
The Reopening of the Roosevelt New Orleans


And more favorite New Orleans-style cocktails from notes from maggie's farm:
The Cocktail Hour: How to Build a Bloody Mary Bar
Like a Hurricane

And tomorrow the Mardi Gras revelry continues with a rare treat for me.  One that I rarely find away from the Deep South, and it's just been too long......Can't wait to share it with you.  

headed to the big easy!

wordless wednesday
notes from maggie's farm


Yesterday, my sweet groom of a few years, surprised me by planning an impromptu road trip to celebrate our anniversary.  We'll load up the feeders with extra hay and water, and will be driving in that direction by the time you read this.  One day, we're going to be to old to do this all-night switch-off driving, but that day's not THIS day, so we're on our way.  We're heading to my happy place-- New Orleans!  You can bet we'll have all manner of sights, sites, tastes and sounds (like some of those, above and below, to share upon our return.  Oh, Happy Day!

stocking the larder: preserving by freezing

tips for tuesday
notes from maggie's farm


When the gardens start churning out fresh produce, you might just find yourself with more food on your hands than time to can it.  An easy, quick solution is to freeze some of that bounty for later enjoyment. Below, find 5 Steps to Freezer Success-- Tips from The Kitchn.

Seize the Season
from thekitchn.com

5 Steps to Freezer Success:

1. Pick Prime Produce - Choose vegetables at the peak of their season and when possible, freeze soon after harvesting.

2. Quickly Blanch - Cook the vegetables for a short amount of time in boiling water to stunt their ripening enzymes. Check out this master guide from Colorado State University for precise blanching times for a variety of vegetables.

3. Chill Throughly - Remove the vegetables from the boiling water and immerse in ice water until the temperature has fully come down. This may take as long as the veggies were immersed in boiling water -- don't rush it!

4. Pack Tightly - The way you package your vegetables for freezing can make or break the finished product. We recommend the tray method of spreading veggies on a sheet tray until frozen solid, and then transferring to a heavy plastic bag or other container.

5. Thaw Within a Year - Frozen veggies don't last indefinitely and while they won't become toxic if you forget the zucchini in the back of your fridge for 2 years, the thawed result won't taste as good as if you used it sooner.

Also, see Storing Fresh Tomatoes.

What are your favorite ways to extend the life of fresh produce?

in honor and celebration of our nation's heroes

memorial day
notes from maggie's farm


lemon-scented coconut milk panna cotta with mixed berries

ingredients
1 cup coconut milk
1 pkt unflavored powdered gelatin
2 cups heavy cream
1/3 cup honey
1 tablespoon sugar
pinch salt
zest one large lemon
2 cups mixed fresh berries


directions
Place the coconut milk in a small bowl. Sprinkle the gelatin over. Let stand for 5 minutes to soften the gelatin. Heat heavy cream in a saucepan, stirring over medium heat about 5 minutes, being sure not to let the cream boil.  Add coconut milk and gelatin mixture, stirring to dissolve gelatin. Continue heating on medium, 5 minutes. Add the honey, sugar, salt, and lemon zest, stirring until sugar is well dissolved. Remove from the heat. Pour into 4 dessert stems, or molds.( see alternative serving below). Allow to cool slightly, about ten minutes, then refrigerate until set, overnight (or about 8 hours)  Rinse and blot dry fresh berries, spoon atop panna cotta, and serve.


Alternatively, if using individual molds, unmold by carefully dipping the bottom of each ramekin or mold in a baking pan of hot water briefly. Run a thin knife around edge of each to loosen it from the inside of the mold. Wipe the outside of the mold dry, and carefully invert on an individual chilled serving plate, atop a puddle of blueberry coulis, below, garnish with berries, and serve. 

blueberry coulis
To one cup fresh blueberries in blender jar, add 1/8th cup honey, or to taste. Puree until smooth.


++++++++++++++++
when you go home, tell them of us and say,
for their tomorrow, we gave our today--unknown 
Photo courtesy of Georgia Council on Economic Education
Thank you.


the garden gate

saturday simplicity
notes from maggie's farm


I will go where I will go

And I will jettison all dead weight
And I will use these words for kindling
And I will sleep by the garden gate.
― John Darnielle

misplaced mojo: mixed legume salad with balsamic basil vinaigrette (or something like that).

freestyle friday
notes from maggie's farm


Sigh.

Internet issues, car issues, plant issues, living-in-the-sticks issues. Some days sap the strength out of you.  


Some days you just. don't. have it.


You know how you walk into the kitchen full of hope and.......... nothing.  Nothing comes.  No creative juices flow. You've misplaced your culinary mojo.

I have days like that. In fact, today is like that. I've got nothing. Jack. Nada.

Which is quite unfortunate, because it's a holiday weekend and I should be brimming with fabulous holiday eats, no?

Well, no. I'm not.

Hopefully the muse will return tomorrow. Or maybe the next day. But for today, I need something easy. Something with little effort, big return--something that will belie the fact that I am floundering.

I need bright, delicious, healthy, easy.

Bingo! I have those leftover beans from this meal. Half of three cans each of fiber and protein-rich legumes. And I've got a plan.

I've got a plan because I always have a plan for days like these. I keep a plan for those days when being fabulously creative hurts my head.
You need a plan, too.

My plan is this:  Legumes+Crunchy Veggies+Fresh Herb+Vinaigrette+Seasonings

Now, play with that.  Take out what you already have in the pantry, garden, or fridge, and make a masterpiece. This is what we did with those leftover beans from earlier this week:

Canned Beans:  We used red beans, black beans, and garbanzo beans.
Fresh Vegetables: We used celery, chopped up the leaves and all, sweet onion, and a mild anaheim pepper--we didn't seed it, just chopped the whole thing.
Fresh Herb: We used the flowering tops of basil, and some leaves, chopped fine.  Leaves, alone, will be just fine.  We just wanted to utilize what we'd pruned from them, earlier.  Waste not, want not.
Vinaigrette:  Really?  We just used a great aged balsamic and a buttery italian olive oil.  Nothing Fancy.
We seasoned our dish with roasted lemon (more on that later), salt, pepper, and one crushed garlic clove.


Our bean choices (choices made by what was leftover, but any one, or combo of beans will do) were drained and rinsed well.  We chopped up the veggies we had in somewhat uniform shapes and sizes. Carrots are great in here, if you have them.  We've also used chopped kohlrabi, baby turnips, radishes--really anything crunchy. We crushed and minced one clove of garlic--tossed that in and mixed well.  We chopped up some fresh basil. Dill, sage, cilantro, oregano, marjoram--they'd all be welcome, too. We tossed it with a balsamic vinaigrette (really?  We just eyed about 1 part balsamic vinegar to 2 parts olive oil and poured it over the assembly.  No fancy footwork today.).  And we corrected the seasonings by adding salt and freshly-ground pepper and this roasted lemon condiment we have bottled up.  We'll be sharing that in an upcoming post, (in fact tomorrow if I can get my act together today, but it's looking iffy) because we LOVE it, but right now, you can just grate a little lemon zest atop, or leave it out entirely.  Toss it all together, refrigerate for about 30 minutes..and serve.

p.s. We had a little barley leftover from that dinner, too, and we tossed that in later, along with some ricotta cheese.  Its was great.  This leftover thing can really extend the life of one meal's preparations.  Who doesn't need a little help like that occasionally?  Like today.

"Success is the ability to go from failure to failure without losing your enthusiasm."
~ Sir Winston Churchill

coffee cupping at houndstooth--austin

thirsty thursday
notes from maggie's farm 
I have measured out my life with coffee spoons.  ~T.S. Eliot
Clockwise from left: Sean Henry, owner, Houndstooth Coffee, Eli Castro of Grubbus, and Meredith Bethune of Biscuits of Today.
This Sunday past, we had the good fortune to attend a private  'coffee cupping', graciously hosted by Sean Henry, owner of Houndstooth Coffee, Austin, arranged in concert with Eli Castro, a fellow Austin Food Blogger Alliance member and author of the website, Grubbus.

Austin
Seeing as how I learned to drink coffee in South Louisiana, where they say you can stand a spoon straight up in the cup, and that babies are weaned with 'coffeemilk' in a baby bottle (which is not entirely untrue), I thought I might know a thing or two about coffee.  I sure knew what I liked- piping hot, dark, and creamy, and absolutely knew what I don't like- coffee that looks suspiciously like tea.

Tuning in, and turning on, our coffee palate.

But boy was I wrong. Aside from preparing coffee properly (and we'll get to that), I actually found myself floundering.  Because just as complicated is the 'nose and palate' of wine, is at least as much, if not more, are the nuances of coffee.

We began, after introductions, by tasting different varieties of apples, to both cleanse our palates, and to prime us for considering the unique qualities of each coffee we were about to encounter.  Much as one apple had a citrus bite, so might one coffee.  And apple that was dense, well, coffee can be dense, too.  The entire group participated, and began to offer some pretty sophisticated observations. About the apples.


The nose—some have it, some need practice.  Lots of practice.
But then, it was time to 'smell the coffee'.  Literally.  Five unique roasts were separated into glass cups, and we all made our way around the shop, pencils in hand, making notes about the aromatic qualities of each, and what we thought upon very first 'sniff'.  And herein laid the rub.  For as much as I wanted to, I simply did not smell the 'tinge of grapefruit', or the 'grassiness', or the 'tobacco leaf'. I smelled 5pm on the front porch.  I smelled almost time for school.  I smelled breakfast in bed on Sunday morning.  And Tom?  Well, he smelled coffee.  

We took copious notes--we so wanted to be good students of the barista!  That's how we roll.  But notes or no notes, the nose was elusive.
Sean did tell us that developing a nose would take much practice, although it didn't seem to be difficult for many of my fellow bloggers.  For Tom and I, along with my friend, Christy Horton of epicuriosities, whose opinion on matters all things culinary I have come to trust—not so much.  Perhaps sophisticated coffee noses will come, but the three of us just smelled coffee.  And we wanted some.

Sean demonstrates the process: sniffing, breaking the crust, slurping
And that's when it got good.  We could smell the coffee.  Not tobacco, not grass, not grapefruit.  Just coffee; coffee being prepared.  And that kept us encouraged as Sean demonstrated the process of  'cupping'.

Beginners Step-by-Step Guide to Cupping

And then we all got down to business, sniffing, breaking a crust, slurping, and moving about to slurp some others.  
And then, soup spoon in hand, we all got to the cupping part, which was lots of fun—everyone elbowing, politely, to 'sniff', 'break the crust', and 'slurp' the coffee across our palates.  Sean was gracious and did not laugh at me as I practiced the proper 'slurp'.  No one else did, either, because they were too busy getting their own 'slurp' on.

And the holy grail---a great cup of Joe.

When the slurping settled, we gathered back for final words, questions…..and COFFEE.  Now, they're purists here you know, so no creamer.  NO sugar.  Just straight black.  But after the those grinds nuzzled into the steamy water in the top of that coffee clever, what we were left with was one perfect, not to be messed with, hearty cup of coffee.  

It tasted just like I want another cup.

Some notes:
  • Just where does coffee come from?  WHAT does coffee come from?  Our cup was the end of a long chain.  From Houndstooth.com
End of a long chain…
Tree – Coffee varietals abound, 4-6 years to produce first cherries
Picker – Coffee picked as its ripest moment.
Miller – Coffee cherry processed in a washed or unwashed method.
Dryer – Coffee dried on flat ground or raised beds.
Farmer – Coffee overseer and regulator throughout the process.
Exporter – Coffee shipped.
Importer – Coffee received.
Roaster – Coffee roasted, shipped.
Barista – Coffee brewed.
Customer – Coffee enjoyed. 
Also see From a Cherry to a Cup-- The Life and Journey of Coffee Beans


 "Herbal tea tastes so much better when it's coffee."

--unknown

Here's to one perfect cup of Joe.


salad days: creamy summertime dill dressing

tips for tuesday
notes from maggie's farm


We're making our way into the hot, sweaty, dirty days of harvesting around here, and while it can be an arduous task, it makes for delicious lunches, straight from the gardens. Lettuce is still around for a week or so more, and we just managed to harvest our first few red tomatoes that weren't nabbed by squirrels and rabbits, taken to enjoying their midnight snack in the middle of our bounty.  We've got cucumbers, young garlic, sweet onions, herbs, a few more days of peas, cabbages, potatoes and all sorts of goodies just around the bend with which to fill our salad bowl.  


Big Day in the Gardens!
We, or I, (during the week when the other farmer plays hooky from farm duty and chills out at his other two jobs--slacker), will need nourishment, and maybe some relief, around midday, and off comes the messy gloves and shoes at the back door, as an armful of freshness is carried inside to be washed, and dressed simply, for wholesome sustenance.  Just enough fruit-of-the-earth goodness to keep one encouraged to go back out, afterwards, and continue the work.

But not any dressing will do.  No bottled stuff full of sugar and sodium and oddly-named ingredients will spoil what we've spent so many hours organically tending and pampering and coaxing food from the seed.

So this week's Tip for Tuesday, a simple summery all-purpose vegetable dressing, comes along just as the salad days are upon us, quick and easy, meant to complement, not overpower, the delicate ingredients.  We keep this on hand because store-bought won't do, and whisking, mincing, chopping and the like have no place in the middle of a busy day.  Our favorite way to keep the veggies on the best dressed list.....


Yields 1 Pint

Ingredients
1 cup sour cream
1 cup half and half
1T dill weed (just plucked from the stems) or 2t dried dill weed
1t onion salt
a couple of coarse grinds of the pepper mill

In a quart jar (giving room for the blending of ingredients), combine all of the ingredients above, and shake (furiously) until well blended. (For a silky smooth dressing, you may prefer to mix in a blender, though we're rather fond of the occasional lumpiness.) Refrigerate to allow flavors to 'bloom', an hour or so.  Taste, correct seasonings, and drizzle on mixed greens, alone, or along with other chosen salad additions.  

Note:  This yields a fairly thick dressing, great for cabbage and firm greens like romaine, chard, or kale, and even tossed with potatoes for a quick, fresh-tasting take on an old standard.  If using for a more delicate salad, such as the butter lettuce we've used here, or perhaps finely shredded cole slaw, I often dilute with a little water or rice wine vinegar to thin.


If you're a salad fan/fiend like myself, you might enjoy the following salad posts: 


This post was featured by

and, 

monday always comes: bean and barley stuffed acorn squash with ricotta

meatless monday
notes from maggie's farm


“In my life long study of human beings, I have found that no matter how hard they try, they have found no way yet to prevent the arrival of Monday morning. And they do try, of course, but Monday always comes..."  ― Jeff Lindsay, Dexter in the Dark
Whether you find yourself, today, in an office desperately trying to catch up on emails, working through the piles of laundry your family wore through this busy weekend past, or, like we are, spending the day catching up on gardening and farming chores that went neglected, we likely all have one thing in common--we need a healthy meal that takes little trouble and time, but nourishes us well, in order to tackle Monday, with all its demands.  Low fat, low calorie, and low maintenance are among the list of desires this hearty and wholesome meatless meal meets, boasting high fiber, beta carotene, and whole grains, as well.  All this, with preparation, and munching all out of its own handy fresh shell--it is one powerhouse of a Manic Monday's personal assistant.  

bean and barley stuffed acorn squash with ricotta
serves 6, as entree, or 6-12 as a side


Ingredients

3 whole acorn squash, halved and cavities de-seeded
3 cups prepared barley (cooked according to package directions)
1 can, each black beans, red beans, and garbanzo beans, drained and rinsed)
2T olive oil
1 large onion, chopped
3 stalks celery, sliced
3 cloves garlic, minced
1 cup homemade ricotta cheese, with 3T reserved to sprinkle atop (or best quality grocery store ricotta, to substitute)
1 T chopped fresh sage
2 T balsamic vinegar
kosher salt and freshly ground black pepper to taste


Optional additions to stuffing: seeded and chopped tomato, chopped water chestnuts, chopped walnuts, almonds, or pecans, shredded kale or swiss chard, sliced mushrooms.


Preheat oven to 375 degrees, Fahrenheit. 


Prepare acorn squash as directed and set aside.  Prepare barley, and set aside to cool.  Drain and rinse canned beans. In a large bowl, toss beans and barley.


Saute in 2T olive oil, onion, celery, and minced garlic until onion is just transparent and celery is still al dente. 


Add to beans and barley, along with ricotta cheese, crumbled, sage, vinegar, and salt and pepper to taste.  


Firmly fill acorn squash halves, and mound high, as shown. 


Bake in casserole dish, covered with foil, for 30 minutes. Remove foil, sprinkle with reserved ricotta, return to oven, and bake additional 15 minutes, or until cheese and stuffing top in golden. 


Remove.  Return foil to cover and allow to steam, while cooling, for 5-10 minutes.  Serve.


“Don't mess with anybody on a Monday. It's a bad, bad day.” ― Louise Fitzhugh, Harriet the Spy
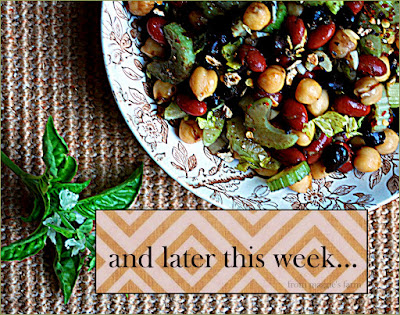
Leftover filling?  We've got that covered.  Later this week we make this meal do double duty. With just a few turns of the wrist, make a fresh and filling marinated salad that we love to snack on around here, all week long.  


make some queso!

freestyle friday
notes from maggie's farm


Friends, I cannot be held responsible for the effect that what I'm about to share with you is going to have on your soul, your waistline, or your love life.  You must agree to not hold me liable for late-night open-fridge plunderings, glassy-eyed, full-tummy states of bliss, or that crowd of people that's going to be following you around.  Because whatever your feelings about the ubiquitous melted processed cheese product dip (really. c'mon.  it's pretty good.  not real good for you.  but hard to pass up.), you can put all not-real-food guilt aside, and just be cheesy fabulous.  Seriously.  We;re about to make...

Homemade Queso
from cow to cupful, all natural, homegrown heaven.


Yield: 1 1/2 quarts

Ingredients
1 gallon raw milk (see notes, below)
1/8t mesophilic starter culture
1/16th liquid rennet diluted in 1/8 cup cool water
3t baking soda
2t kosher salt (adjust to taste)
2T butter

1. Heat milk to 86 degrees. Turn off heat. Add the mesophilic starter and mix thoroughly.  Add diluted rennet and stir with an up and down motion.  Put the lid on the pot and let it sit for 12 hours.  Before proceeding, make sure there is a layer of whey (the yellow-ish clear liquid) on top of the curd. If not, let it sit a couple of hours longer so the curd firms up.

2. Using a big slotted spoon, scoop the curds into a colander lined with butter muslin. Tie the ends of the cheesecloth/muslin and hang to drain for 12 hours until very thick, like cream cheese. Turn cheese over in the muslin bag after 3 hours of hanging so inside of cheese drains well.


3.  In a large bowl, mix baking soda and salt into cheese curds.  Beat with an electric mixer until cheese is light and airy and baking soda and salt are thoroughly mixed through.

4. Let sit for 30 minutes.  Melt the butter in a large saucepan (I call on my nonstick deep fryer for this).  Add the cheese and stir to combine with butter. Melt on low heat.  If desired, you may add cheese coloring, or annato, while the cheese is melting. About a dozen drops will color cheese a deep yellow orange like the processed cheese you buy in the store.  I skip this step.  I like the 'look' of homemade.


5. In about 3 minutes, you should have a beautiful, smooth cheese ready to go into a mold.  I've used a loaf pan, lightly sprayed with nonstick silicone spray, for ease of removal.  Chill until solid.  When ready to use, cheese should slip out of the mold easily, for slicing. If it's a little stubborn, slice around the edges with a knife to loosen from the sides of the pan, and tap pan firmly after inverting on plate.  Alternatively, you can simply scoop it from the pan.

6. If your cheese comes out thinner than you'd like, try draining the cheese longer for your next batch, or mix in a little cornstarch diluted in cool water when heating the cheese with the butter.

Okay--a few notes.  First, all credit for the above recipe, and most of my cheesemaking skills is due Center for Essential Education, a service of Homestead Heritage, a religious community in Elm Mott, Texas.  I've attended many classes, visited just to soak in some homestead inspiration, and attended special fairs where I've learned new skills such as soapmaking, felting, spinning, and more.  They offer all kinds of homesteading classes, among them blacksmithing,  animal husbandry, organic gardening, and baking, canning, sewing-- agrarian skills that are enjoying a renaissance among Do-It-Yourself  Sustainability-minding communities. You can read more about one of my cheesemaking class experiences from last summer, here.

Onto ingredients and materials-- Obviously, there are a few items here you're not going to find on common grocery store shelves.  Where to procure?

Depending upon location, raw milk can be tricky to obtain. Some states have laws to protect you from such tomfoolery as home cheesemaking.  Some states allow raw milk to be purchased directly from the farmer/dairy, and some states only allow this if the milk is intended for animals (not including you and what your cheese cravings turn you into).  An internet search for raw milk (your state) should tell you everything you need to know, and after a little digging, you'll find local sources (ours is commonly purchased here).

Searches for home cheesemaking should be helpful, also.  Our local home beer brewing supply carries cheesemaking supplies, including cultures and rennet.  The product commonly sold as cheesecloth will be of no use to this process, only causing you lost time, money, cheese, and patience.  Butter muslin is what you want--a much finer weave, and can be washed and reused over and over.  You can find most of these products for sale online or through mail order catalogs.

To make chile con queso, or simply queso, as it's referred to in these parts, we've melted our batch of cheese with a few tablespoons of fresh, chopped cilantro from the herb bed (stemmed or not.  We like the stems chopped finely along with the leaves for a little texture.), about a cup of roasted tomatoes (these are tomatoes we've roasted and canned at home.  That will have to wait for another post, however you may substitute canned roasted tomatoes, or simply plain tomatoes, chopped fresh or canned.  Drain as much as the liquid as possible to keep queso from being disappointingly runny.), and thinly sliced serrano peppers, straight from our garden.  You may substitute the milder jalapeno, the even milder New Mexico chile, or omit entirely (which makes us very sad.).  Also, seeding and stemming your peppers will take quite a lot of the heat out--notice we have not.  We sometimes add a little bit of cumin, but be cautious-- a little goes a long way, and like cilantro, some people have an aversion to the taste of cumin.  Slowly blend all in as cheese melts, stirring as you go.  Queso will thicken as it cools. (and we take that as a sign to eat it with intention.)

While it may seem like we're just gilding the lily at this point, we sometimes make what you'll find in local restaurants under names like queso especial, or (insert name of establishment) queso, or queso-that's-ridiculously-kicked-up-a-few-notches-as-if-it-weren't-already-decadent-enough--and that is a bowl of crazy-delicious; a scoop of guacamole, a smattering of pico de gallo, then a dousing of queso, above.  You dip your chip straight down--then retrieve creamy guac covered in dripping, tangy queso, and perhaps a chopped tomato, onion, or pepper slice, too.  I'm going to have to stop the description there.  I'm quite overcome. Oh my, now I want it for breakfast.

When we first moved here 15 years ago, this then-single mom allowed her young daughter to eat this bowl of saturated nirvana for dinner--yes, the entire bowl, and that, only, because she said it was the best thing about Texas. Hey! She was homesick. I occasionally indulged her desire for comfort food.  What can I say?  Although, for a time there, it appeared to be our common gateway drug-- we were junkies for all things Tex-Mex.  We eventually righted the ship and got back to all things in moderation.  We missed green vegetables. But I digress.

Could you just melt the cheese without adding anything to it?  Well, sure!  And you'd have a very fine cheese sauce all on it's own if you did. We've drizzled it over sauteed spinach, broccoli, cauliflower, an omelet, and our finger.  It's all quite good.

So its a few hours away--Friday Happy Hour, that is, and there will be hundreds, neigh thousands, of joyful, perhaps slightly inebriated people ushering in the weekend, dunking away their chips in a bowl of yellow goodness all over Texas, and Tex-Mex ports, beyond.  Why don't you one up them all, maybe mix up a batch of margaritas or put a few cervezas on ice.....and make yourself some all-natural, homemade.....

QUESO!


Related Posts Plugin for WordPress, Blogger...